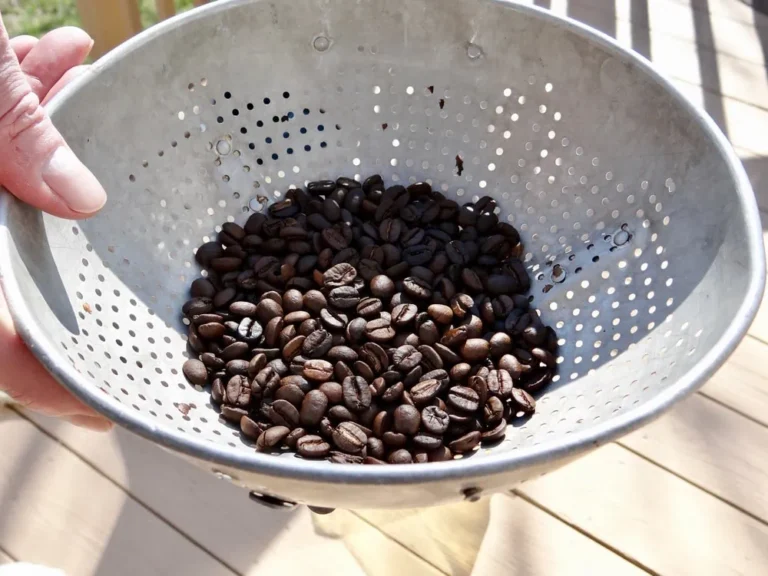
Roasting coffee beans at home is a rewarding experience that allows you to enjoy the freshest possible cup of coffee with flavors tailored to your preference. The process can be simple and requires minimal equipment, with several methods available to suit different tastes and skill levels. Whether you’re a coffee aficionado or a curious beginner, home coffee roasting offers a delightful journey into the heart of coffee’s rich and complex world.
Key Takeaways
- Home coffee roasting is accessible, providing a fresh and customized coffee experience.
- Understanding roast levels is crucial for achieving the desired flavor profile in your coffee.
- The choice of roasting method—oven, stovetop, or air popper—impacts the taste and quality of the roast.
- Monitoring the roasting phases and listening for the ‘first crack’ are key to determining roast completion.
- Proper cooling, storage, and brewing techniques are essential to enjoy the full potential of your home-roasted beans.
Introduction to Home Coffee Roasting
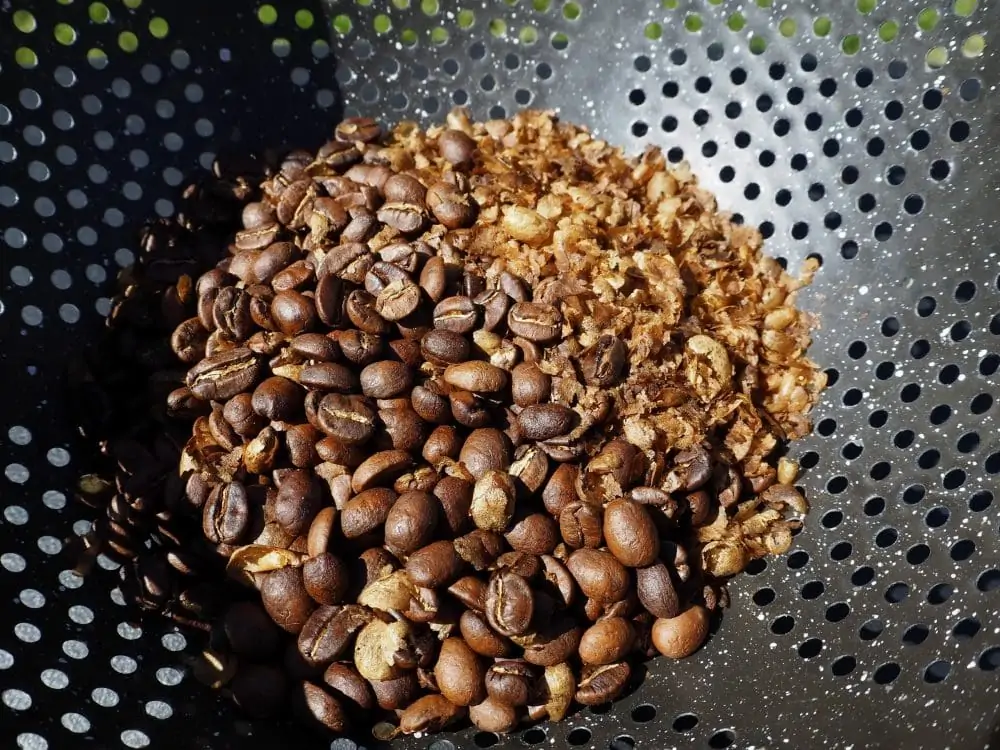
Embarking on the journey of home coffee roasting opens up a world of flavor possibilities and a deeper connection to your daily cup. Roasting your own coffee beans at home not only allows you to explore a range of taste profiles but also gives you control over the freshness and quality of your coffee.
By understanding the nuances of the roasting process and experimenting with different beans and techniques, you unlock the full potential of your coffee.
The process of roasting is both an art and a science, requiring attention to detail and a willingness to learn through trial and error. As you roast more coffee, you’ll become adept at identifying how different beans express their unique flavors during roasting. This article will guide you through the essential steps and methods to achieve the perfect roast at home.
Choosing the Right Coffee Beans

Selecting the right coffee beans is crucial for achieving the perfect cup of home-roasted coffee. The choice of beans will significantly influence the flavor and quality of your brew. It’s recommended to opt for whole bean coffee over pre-ground options to ensure maximum freshness and taste. Whole beans maintain their flavor longer and allow you to grind them to the specific coarseness required for your brewing method.
When considering which beans to purchase, take into account your preferred roast level—light, medium, or dark. Each roast level brings out different flavor profiles and characteristics in the coffee. For instance, a light roast will typically have a brighter acidity and retain more of the bean’s original flavors, while a dark roast offers deeper, bolder notes.
Remember, the best coffee beans are the ones that cater to your personal taste preferences. Whether it’s a vibrant single-origin or a balanced blend, the key is to find a coffee that you love.
Here are some tips for choosing coffee beans:
- Use whole bean coffee for the best flavor and freshness.
- Consider the roast level that suits your taste preferences.
- Store your beans in a cool, dry place, in an air-sealed container to maintain freshness.
Lastly, while having a scale for precise measurement can enhance consistency in your coffee-making process, it’s not an absolute necessity. You can still achieve a great cup of coffee without it.
Understanding Roast Levels

Understanding the Degree of Roast is crucial for home coffee roasting. It’s not just about the color; it’s about the flavor, aroma, and overall profile of your coffee. Here’s a quick guide to the basic roast levels:
- Light Roast: Often lighter in color with no oil on the surface, these beans are roasted to preserve the unique characteristics of the coffee. They typically have higher acidity and retain the origin’s flavor nuances.
- Medium Roast: A medium brown color, often preferred in the United States. These beans offer a balanced flavor, aroma, and acidity.
- Dark Roast: Dark brown, sometimes almost black beans with a shiny oil surface. These roasts have a pronounced bitterness and lower acidity, often with smoky or chocolatey undertones.
Choosing the right roast level is a personal journey. It’s about finding the balance that suits your taste and complements your brewing method. Experiment with different levels to discover how they alter the taste and aroma of your coffee.
Remember, the roast level significantly affects the temperature of coffee, impacting its flavor and aroma. For instance, a light roast brews at a higher temperature, emphasizing acidity and complex flavors. Conversely, a dark roast brews at a lower temperature, providing bold, smoky flavors and lower acidity.
Oven Roasting Method

Roasting coffee beans in your oven is a straightforward method that doesn’t require specialized equipment. Preheat your oven to around 450-500 degrees Fahrenheit (232-260 degrees Celsius), which is the optimal temperature range for roasting coffee beans. Spread the beans in a single layer on a baking sheet, ensuring they have enough room to expand and that air can circulate around them.
During the roast, you’ll want to shake the pan occasionally to promote even roasting and prevent the beans from burning.
Once the oven reaches the desired temperature, place the baking sheet inside and monitor the process closely. The beans will go through several stages of roasting, and you’ll need to decide when they’ve reached your preferred roast level. Here’s a simple guide to the stages you’ll observe:
- Yellowing: Beans turn a light yellow color and emit a grassy smell.
- First Crack: A distinct cracking sound signifies that the beans have entered the light roast stage.
- Development: After the first crack, the beans will continue to darken as they develop richer flavors.
- Second Crack: A second, quieter crack indicates a medium to dark roast.
Remember, the exact timing will vary depending on your oven and the type of beans you’re using. Always stay attentive to the changes in color, smell, and sound.
Stovetop Roasting Method
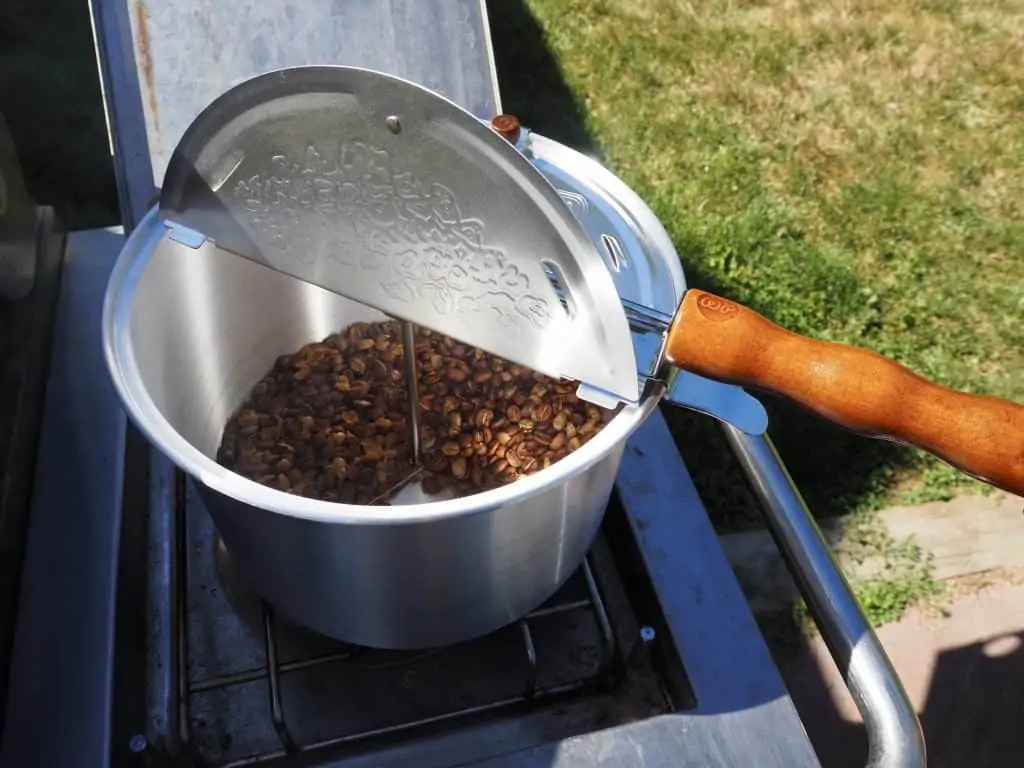
Roasting coffee beans on the stovetop is a traditional and accessible method that allows for close monitoring and quick adjustments. Preheat your skillet over medium heat for a few minutes before adding the green coffee beans. This ensures a consistent temperature throughout the roasting process.
Keep the beans moving constantly by stirring to promote even roasting and prevent burning.
Once the beans are in the skillet, listen for the ‘first crack,’ an audible signal that the beans are roasting. Adjust the heat as necessary to maintain the desired roast level, which will affect the final flavor and aroma of your coffee.
- Light roast: Higher temperature, emphasizing acidity and complex flavors.
- Medium roast: Moderate heat, balanced taste with caramel notes.
- Dark roast: Lower temperature, bold and smoky flavors.
Remember, the more you roast, the more familiar you become with the coffee’s flavor profiles and how they manifest through roasting. Don’t hesitate to experiment to find the ideal roast level for your taste.
Air Popper Roasting Method
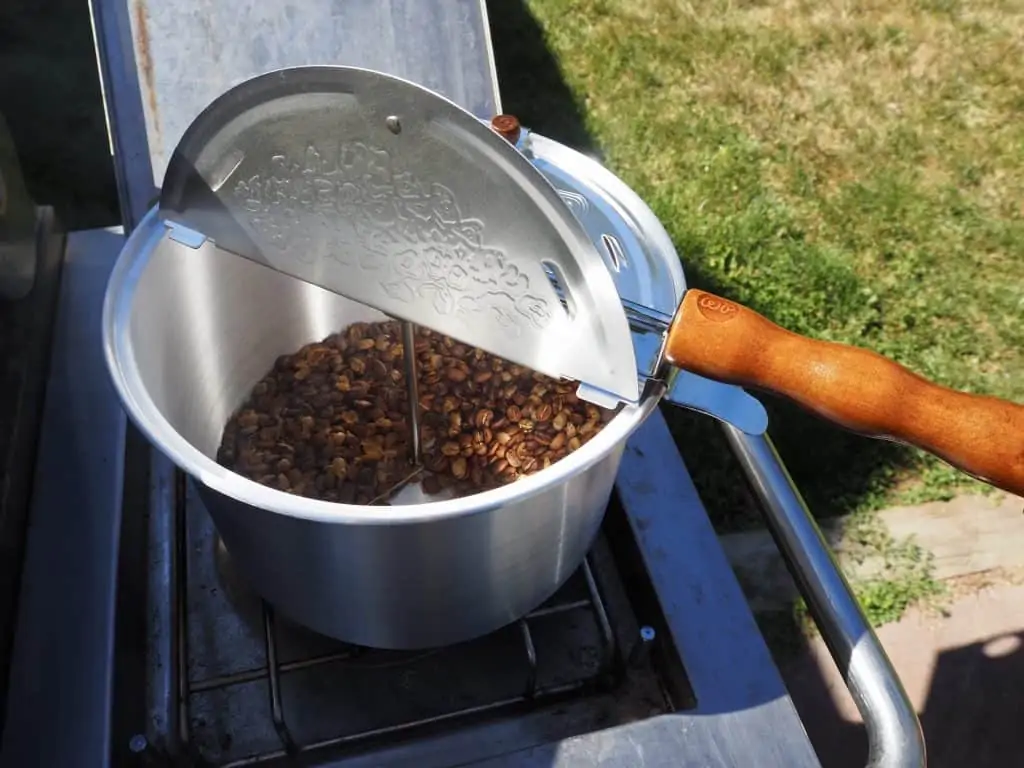
Roasting coffee beans at home using an air popper is a simple and efficient method that can yield excellent results. The key to success is controlling the temperature and roast time to achieve your desired roast level. Here’s a step-by-step guide to using an air popper for roasting coffee:
- Measure out your green coffee beans. A typical air popper can handle about 1/2 cup at a time.
- Ensure the popper is clean and free from any old coffee or debris.
- Preheat the air popper for about 30 seconds before adding the beans.
- Add the beans and start the popper. Keep a close eye on the color and smell of the beans.
- Listen for the first crack, which typically occurs around 3 to 5 minutes into roasting.
- Continue roasting until you reach your desired roast level, then promptly remove the beans and cool them.
Remember, the roasting process doesn’t stop immediately when you remove the beans from the heat source. They will continue to roast slightly due to their internal heat, so it’s best to pull them just before they reach the perfect roast level.
By following these steps and monitoring the beans closely, you can achieve a range of roast levels, from light to dark, to suit your taste preferences. Experiment with different roast times to find the perfect profile for your palate.
Preparing Your Roasting Equipment
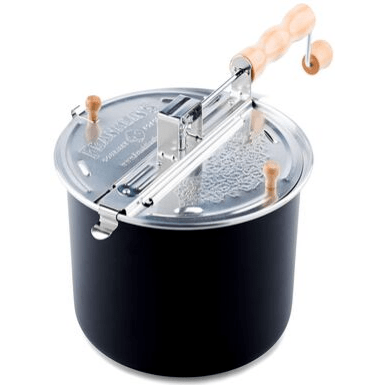
Before you begin roasting, it’s essential to have all your equipment ready. Proper preparation is key to a successful roast. Start by gathering the necessary tools:
- A coffee roaster suitable for home use
- High-quality green coffee beans
- A reliable thermometer or a way to measure temperature
- A scale for precise bean measurement
Remember, roasting coffee at home requires specialized equipment to ensure consistency and quality. Preheat your roaster to the desired starting temperature, which will vary depending on the roast level you aim for. This initial step is crucial as it sets the stage for the entire roasting process.
Consistency in roasting is not just about the equipment; it’s also about the approach. Take the time to understand your roaster’s capabilities and how it responds to different bean types and roast levels.
Once your equipment is prepared and preheated, you’re ready to move on to measuring and weighing your coffee beans, the next critical step in the home roasting journey.
Measuring and Weighing Coffee Beans

Before you begin roasting, it’s crucial to measure and weigh your coffee beans accurately. Consistency is key to achieving the desired flavor and strength in your coffee. The amount of coffee you use will significantly affect both the taste and caffeine content of your brew.
For those without a scale, using volume measurements like scoops or cups can be tempting. However, this method can lead to inconsistency due to varying bean densities. Light roast beans are denser and therefore heavier than dark roast beans, meaning the same volume will weigh more and contain more caffeine.
To ensure precision, use a digital scale to weigh your beans. Here’s a simple guideline to get you started:
- Light Roast: More dense, requires careful weighing
- Dark Roast: Less dense, may weigh less for the same volume
Remember, the “golden ratio” for coffee is about 2 tablespoons of grounds for every 6 ounces of water. Adjust according to your taste preferences and the specific beans you’re using.
Preheating the Roasting Environment

Proper preheating of your roasting environment is crucial for achieving a consistent roast. Start at 500\u00b0F and experiment with higher or lower temperatures to find your perfect roast. This initial temperature is important as it sets the stage for the entire roasting process.
Preheating is not just about the roaster itself; it extends to all equipment involved. Ensure that your roasting pan, drum, or air popper is at the desired temperature before introducing the green coffee beans.
Here are some tips to effectively preheat your roasting environment:
- Rinse any cups or carafes with hot water to warm them up.
- Allow preheated items to sit for a minute to stabilize the temperature.
- Discard any preheating water before starting the roast to avoid steam affecting the process.
Remember, the material of your cup or carafe can also affect heat retention. Thermal carafes are recommended for maintaining the desired temperature longer.
Starting the Roasting Process
Once you have your roasting equipment preheated and your coffee beans measured, it’s time to begin the transformation from raw green beans to aromatic roasted coffee. The roasting process is both an art and a science, requiring attention to detail and a willingness to experiment.
Begin by adding the coffee beans to your roasting device. Whether you’re using an oven, stovetop, or air popper, the goal is to apply consistent heat while keeping the beans in constant motion to avoid uneven roasting.
Here are the initial steps to follow:
- Ensure your roasting environment is stable and at the correct temperature.
- Introduce the beans to the roaster and start the timer.
- Observe the beans’ color change from green to yellow, signifying the start of the roasting process.
Remember, the more coffee you roast, the more familiar you become with the nuances of how different beans express their flavor profiles through roasting. Keep a log of your roasting times, temperatures, and outcomes to refine your technique over time.
Monitoring the Roasting Phases

Monitoring the roasting phases is essential to achieve the perfect balance of flavor and aroma in your coffee. During the roasting process, a series of chemical transformations occur that are critical to developing the coffee’s final taste profile. It’s important to understand these changes to control the outcome effectively.
As you become more experienced with roasting, you’ll learn to identify the subtle cues that indicate the different stages of roasting. This knowledge allows you to adjust the heat, timing, and airflow to highlight the coffee’s best characteristics.
Here’s a simplified breakdown of the key chemical changes during roasting:
- Starches turn into caramelized sugars, enhancing sweetness.
- Chlorogenic acids diminish, which can reduce acidity and bitterness.
- Aroma compounds form, contributing to the coffee’s scent.
Remember, the goal is to roast the beans to a level that complements your brewing method and taste preferences while maintaining the desired temperature throughout.
Listening for the First Crack

After you start the roasting process, one of the most critical milestones to watch for is the first crack. This audible cue signals that the coffee beans have reached the first stage of roasting, akin to a light roast. The beans will emit a sound similar to popcorn popping, indicating the expansion of the beans as moisture escapes and the structure fractures.
The first crack is a pivotal moment in roasting, marking the transition from green to roasted coffee. It’s essential to monitor the beans closely from this point forward, as the roast can progress quickly.
Once you hear the first crack, you’ll need to decide how much longer to continue the roast based on your desired roast level. Here’s a simple guide to help you determine the next steps:
- Light Roast: Stop shortly after the first crack.
- Medium Roast: Continue roasting for a few minutes past the first crack.
- Dark Roast: Wait for the second crack to begin, then stop shortly thereafter.
Remember, the exact timing will vary depending on your roasting method and the specific beans you’re using. It’s a good idea to keep a roasting journal to record the nuances of each batch, which will help you refine your technique over time.
Adjusting the Roast Profile
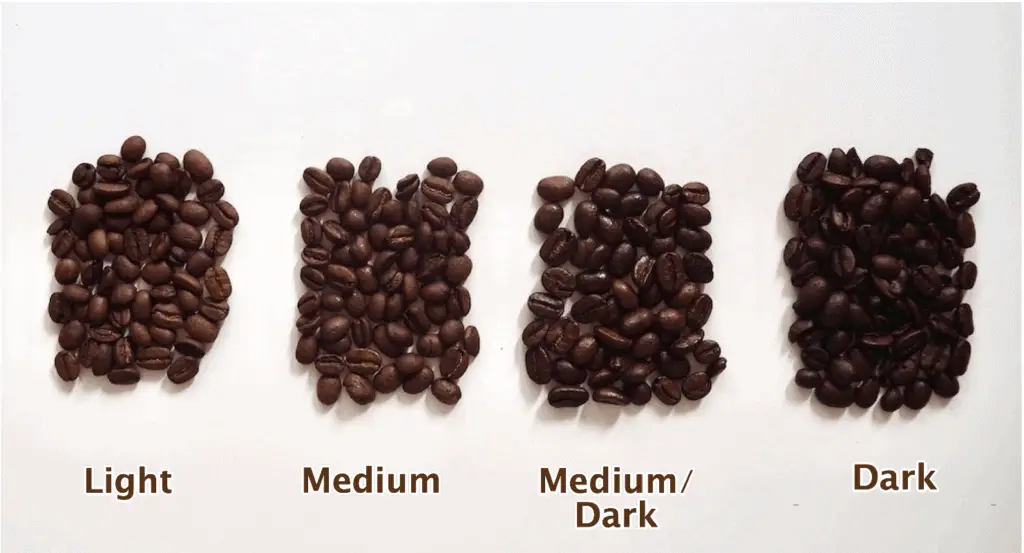
Once you’ve listened for the first crack and gauged the development of your roast, it’s time to adjust the roast profile to suit your taste preferences. This involves fine-tuning the temperature and roasting time to highlight the desired flavors in your coffee beans.
- Light Roast: Start with a higher initial temperature to emphasize acidity and complex flavors.
- Medium Roast: Opt for a moderate temperature to achieve a balanced taste with notes of caramel.
- Dark Roast: Lower the temperature towards the end of roasting for bold, smoky flavors and reduced acidity.
Remember, the goal is to bring out the best in your beans. Coffee beans that are less hard may require a lower initial temperature to prevent over-roasting. As you gain experience, you’ll become more adept at identifying the nuances in flavor that each bean presents. Don’t hesitate to roast and taste repeatedly, adjusting as necessary, until you find the perfect roast level for your beans.
To maintain the desired temperature, choose a roast level that aligns with your preferred brewing method and taste preferences. This will ensure that your coffee is not only delicious but also brewed to perfection.
Cooling the Coffee Beans

Once the roasting process is complete, it’s crucial to cool the coffee beans quickly to stop the cooking process and preserve the desired roast level. Rapid cooling is essential to ensure the beans don’t continue to roast from their residual heat.
To cool your beans effectively, follow these steps:
- Transfer the hot beans to a metal colander or cooling tray immediately after roasting.
- Shake or stir the beans to dissipate heat and allow for even cooling.
- If possible, use a fan to expedite the cooling process by blowing air over the beans.
- Once cooled, the beans should be at room temperature before storage to prevent condensation.
Remember, the goal is to bring the beans to room temperature as quickly as possible without compromising their quality.
Ambient temperature can significantly affect the cooling rate. In colder environments, beans may cool too rapidly, potentially leading to an uneven roast. Conversely, in hotter conditions, additional measures may be needed to cool the beans effectively.
Storing Roasted Coffee Beans

After the beans have been roasted, storing them properly is crucial to maintain their freshness and flavor. Proper storage conditions can significantly extend the life of your coffee beans. It’s important to keep them in a cool, dry place away from direct sunlight and moisture. An air-sealed container is ideal for this purpose.
Here are some recommended storage options:
- Airtight canisters with one-way valves
- Ceramic jars with rubber gasket seals
- Darkly tinted glass containers
- Vacuum-sealed bags
When choosing a container, consider the size of your batch and how quickly you’ll use the coffee. Smaller containers are better for daily use, while larger ones can be more practical for bulk storage.
Remember, the goal is to protect the beans from air, moisture, and light, which can all degrade the quality of your coffee over time. Whether you opt for a simple ziploc bag, a mason jar, or specialized coffee storage containers, the key is to ensure a tight seal.
Grinding Coffee Beans

After selecting your preferred coffee beans, the next crucial step is grinding. The grind size is pivotal to the brewing process, as it influences the extraction rate and overall flavor of your coffee. Depending on the brewing method you choose, the grind can range from coarse to fine. For instance, a French press requires a coarse grind to prevent a muddy cup, while espresso calls for a fine grind to extract the rich flavors effectively.
When using a grinder, you have two main options: a burr grinder or a blade grinder. Burr grinders are generally preferred for their consistency and uniformity of grind. If you’re using a preprogrammed grinder, set it to the appropriate level for your brewing method. For manual grinders, aim for a grind that resembles large sand crystals.
Remember, the freshness of your coffee is significantly enhanced when you grind whole beans just before brewing. Pre-ground coffee may be convenient, but it often lacks the full-bodied flavor and aroma of freshly ground beans.
Selecting the Brewing Method

Once you’ve roasted your coffee beans to perfection, the next crucial step is selecting the right brewing method to fully enjoy the fruits of your labor. Choosing the right brewing method is essential to highlight the unique characteristics of your home-roasted coffee. Different methods can accentuate various flavors and aromas, so it’s important to consider your personal taste preferences when making your selection.
- Drip: Ideal for a clean and consistent cup.
- French press: Best for a full-bodied and rich flavor.
- Espresso: Perfect for a concentrated and robust shot.
Remember, the grind size should match your brewing method: finer for espresso, medium for drip, and coarser for French press.
Experiment with different methods to find the one that best suits your taste. Whether you prefer a bright and acidic cup or a smooth and chocolatey brew, there’s a method that will meet your needs. And don’t forget, the roast level of your beans should complement your chosen method to achieve the optimal flavor profile.
Water Quality and Temperature
The quality of water and its temperature are pivotal in the coffee brewing process. Water that is too hot can over-extract the coffee, leading to bitterness, while water that is not hot enough will under-extract, resulting in a flat, underwhelming flavor. Aim for a temperature range of 195 to 205 degrees Fahrenheit for optimal extraction.
To achieve the perfect water temperature, especially for methods like the French press, heat water to a rolling boil and then let it rest for about a minute before use. This simple step can make a significant difference in your coffee’s taste.
Remember that the material of your cup can also affect the coffee’s temperature retention. Here’s a quick guide to the impact of different cup materials on your coffee’s heat retention:
- Ceramic: Retains heat well, keeping your coffee warmer for longer.
- Glass: Loses heat quickly but allows you to enjoy the visual appeal of the coffee.
- Stainless Steel: Excellent for heat retention, ideal for travel mugs.
- Plastic: Not recommended as it can impart flavors and does not hold heat well.
Coffee-to-Water Ratio

Achieving the perfect balance between coffee and water is crucial for a delicious brew. The coffee-to-water ratio is the foundation of any good cup of coffee. It’s important to adjust the ratio according to your taste preference and the brewing method you’re using. Here’s a simple guide to get you started:
- For a standard brew strength, a good starting point is 1 gram of coffee to 16 grams of water.
- For a stronger brew, you might prefer a 1:14 ratio.
- If you enjoy a lighter coffee, a 1:18 ratio could be more to your liking.
Remember, these are just starting points, and you should tweak the ratios to find your perfect cup. Here’s a quick calculator we created to make the process really simple. All you have to do is pick your brewer of choice and how much coffee you want to make.
The key to mastering your brew is experimentation. Start with these guidelines and adjust based on your taste and the specific characteristics of the coffee beans you’re using.
For those who prefer a more structured approach, here’s a basic table for reference:
| Servings | Coffee (cups) | Water (cups) |
|---|---|---|
| 2 | 1/4 | 2 |
| 4 | 1/2 | 4 |
As you become more experienced, you’ll find that the coffee-to-water ratio is a personal choice that depends on many factors, including the roast level, grind size, and brewing method.
The Blooming Phase

The blooming phase is a critical step in the brewing process that allows for the release of carbon dioxide from the coffee grounds, paving the way for optimal extraction. Begin by evenly saturating the grounds with hot water, ensuring all the coffee is covered. This initial wetting should be done gently and with precision to avoid channeling, where water bypasses some of the coffee.
During the bloom, you may notice a slight swelling or bubbling of the grounds. This is a sign that the coffee is degassing effectively. Allow the coffee to bloom for about 30 seconds before continuing with the rest of the brewing process.
Here’s a simple guide to follow during the blooming phase:
- Wet the coffee grounds with hot water to start the bloom.
- Swirl the brewer slightly to ensure even saturation.
- Wait and watch for the bloom to develop, typically lasting 30 seconds.
- After the bloom, proceed with your pouring technique to continue brewing.
Pouring Techniques

Mastering the pour is crucial in coffee brewing, especially in methods like pour-over where pouring is an art form. A steady, controlled pour ensures even saturation and extraction of the coffee grounds, leading to a balanced cup. Start with a slow pour in the center, then spiral outwards, and finally back to the center.
When using a pour-over method, it’s important to pour in stages: begin with enough water to allow the coffee to bloom, then continue adding water in intervals. This methodical approach prevents over-extraction and highlights the coffee’s best flavors.
Here are the basic steps for a pour-over method:
- Boil water to the appropriate temperature (usually between 195°F to 205°F).
- Grind the coffee beans to a medium coarseness.
- Rinse the filter with hot water to remove any paper taste and preheat the brewer.
- Add the ground coffee to the filter.
- Start your pour with enough water to saturate the grounds and let it bloom for 30 seconds.
- Continue pouring in a slow, steady spiral, pausing to let the water drip through.
- Stop pouring once you’ve reached the desired amount of coffee.
Remember, the key to a perfect pour is consistency and control. Adjust your technique based on the coffee’s response during brewing.
Brewing Time Considerations

The brewing time is a critical factor in the coffee-making process, as it directly influences the extraction of flavors and compounds from the coffee grounds. Different brewing methods require varying times to achieve the ideal extraction. For instance, espresso is known for its quick extraction time, typically around 25-30 seconds, while French press coffee may steep for four minutes or more.
When adjusting brewing times, it’s important to consider the roast level of your coffee beans. Lighter roasts may benefit from shorter brewing times to highlight their delicate flavors, whereas darker roasts might need longer times to fully develop their richer, bolder profiles. Here’s a simple guide to help you get started:
- Espresso: 25-30 seconds
- Aeropress: 1-2 minutes
- Pour over: 2-4 minutes
- French press: 4 minutes
- Cold brew: 12-24 hours
Remember, the goal is to find a balance where the coffee is neither under-extracted, resulting in a sour and weak cup, nor over-extracted, leading to bitterness. Experimentation and adjustment are key to dialing in the perfect brew time for your taste.
Tasting and Adjusting Your Brew

After brewing your coffee, the moment of truth arrives with the first sip. Taste is subjective, and the perfect cup of coffee is the one that best suits your palate. When tasting, pay attention to the acidity, sweetness, bitterness, aftertaste, mouthfeel, and aroma. These elements can guide you in adjusting your brew.
- If your coffee tastes too bitter, it might be over-extracted. Consider shortening the brewing time or coarsening the grind.
- For under-extracted coffee that tastes sour, try a finer grind or longer brewing time.
- Always adjust one variable at a time and take notes to track the changes and their effects.
Remember, the goal is to find your personal preference, which may differ from conventional standards. Trust your taste and make adjustments accordingly.
Here’s a quick reference for troubleshooting common flavor issues:
| Issue | Possible Cause | Adjustment Needed |
|---|---|---|
| Bitterness | Over-extraction | Shorten brew time |
| Sourness | Under-extraction | Lengthen brew time |
| Weak Flavor | Insufficient coffee | Increase coffee amount |
| Strong Flavor | Too much coffee | Decrease coffee amount |
Once you’ve dialed in your preferred taste, you can replicate the process for a consistently satisfying cup every time.
Serving and Enjoying Your Coffee

With your freshly roasted coffee now cooled and ready, it’s time to savor the fruits of your labor. Serving and enjoying your coffee is not just about the taste; it’s an experience that engages all the senses. Here are a few tips to enhance your coffee enjoyment:
- Pour your coffee into a pre-warmed mug to maintain its temperature.
- Take a moment to inhale the aroma; this is where you can appreciate the subtle notes and scents that you’ve worked to develop.
- Sip slowly, letting the coffee coat your palate and noticing the different taste notes, from the initial brightness to the lingering aftertaste.
Remember, the perfect cup of coffee is subjective. What matters most is how it makes you feel and suits your personal taste preferences.
As you refine your brewing and serving techniques, you’ll discover more about your preferences. Whether you prefer a robust espresso or a delicate pour-over, each cup is a step in your coffee journey. We invite you to perfect your daily brew, ensuring every cup is a testament to your growing expertise.
Cleaning and Maintenance

Proper cleaning and maintenance of your coffee roasting and brewing equipment is essential to ensure the longevity of your tools and the quality of your coffee. Regular upkeep prevents the buildup of coffee oils and residue, which can negatively affect the taste of your coffee and the performance of your equipment.
- After each use, wipe down your roaster and any other equipment with a damp cloth to remove any leftover coffee particles.
- Descale your coffee maker every 3 to 6 months to prevent mineral buildup from affecting its function.
- Use specific brushes and cleaning tools designed for coffee equipment to reach all the nooks and crannies.
Remember, the effort you put into maintaining your equipment directly impacts the taste and quality of your coffee.
Additionally, consider replacing water filters regularly to ensure that the water you use for brewing is pure and free of contaminants. Keep track of your maintenance schedule to stay on top of necessary tasks and replacements.
Conclusion
Roasting coffee beans at home can be a rewarding experience, offering a fresh and personalized approach to your coffee routine. Whether you’re a seasoned coffee enthusiast or a curious beginner, the methods outlined in this article provide a comprehensive guide to achieving your ideal roast. From understanding the importance of roast levels to mastering the brewing process, you now have the knowledge to experiment with different techniques and flavors. Remember, the key to a perfect cup of coffee lies in the details: the choice of beans, grind size, water temperature, and brew time. So, take the time to savor the process, and don’t hesitate to tweak the steps to suit your taste. Happy roasting, and enjoy the delightful journey of crafting your perfect blonde roast at home!
Frequently Asked Questions
What are the best coffee beans to use for home roasting?
The best coffee beans for home roasting are high-quality, green coffee beans that are fresh and have been properly stored. Look for beans that suit your taste preference, whether you prefer a light, medium, or dark roast.
Can I roast coffee beans in a regular kitchen oven?
Yes, you can roast coffee beans in a regular kitchen oven, although it may not provide as much control as specialized roasting equipment. Preheat your oven and use a perforated baking tray for even roasting.
What does ‘first crack’ mean in coffee roasting?
The ‘first crack’ in coffee roasting is a popping sound that occurs when the beans expand and crack as they reach a certain temperature. It signifies the transition to a light roast and is a key moment in the roasting process.
How do I know when my coffee beans are roasted to my preferred level?
You can judge the roast level by the color, aroma, and sound of the beans. Light roasts are lighter in color with a toasted grain aroma, medium roasts are medium brown with a stronger aroma, and dark roasts are dark brown to black with an oily surface.
How long should I let my roasted coffee beans rest before grinding and brewing?
It’s recommended to let roasted coffee beans rest for at least 24 hours before grinding and brewing. This allows gases to escape and flavors to develop, resulting in a better-tasting cup of coffee.
What is the best way to store roasted coffee beans?
Roasted coffee beans should be stored in an airtight container away from light, heat, and moisture. Keep them at room temperature and consume within a couple of weeks for optimal freshness.


